
I bought a textured calfskin, which is thin and easy to sew, if you're like me and still can't afford a leather sewing machine. I just sew my leather with some waxed paper or parchment paper between the needle and leather surface.
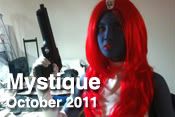
1. Greaves?
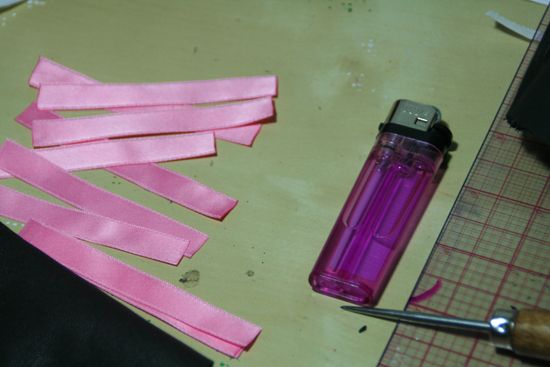
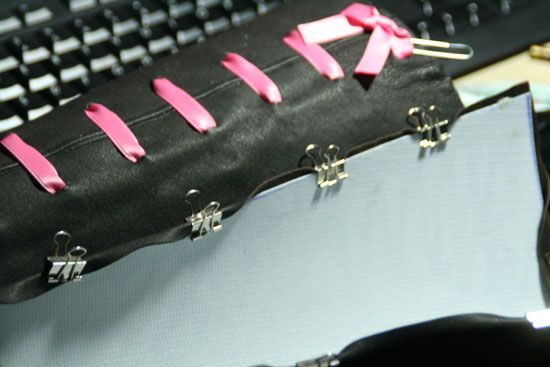
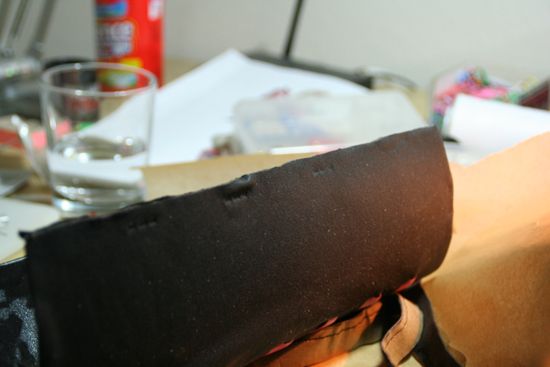
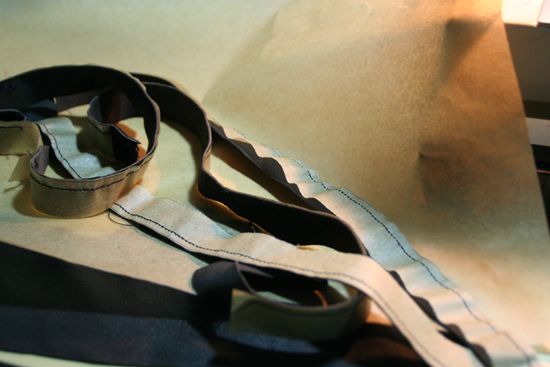
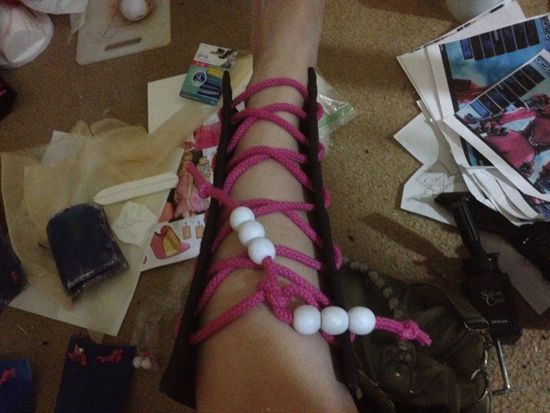
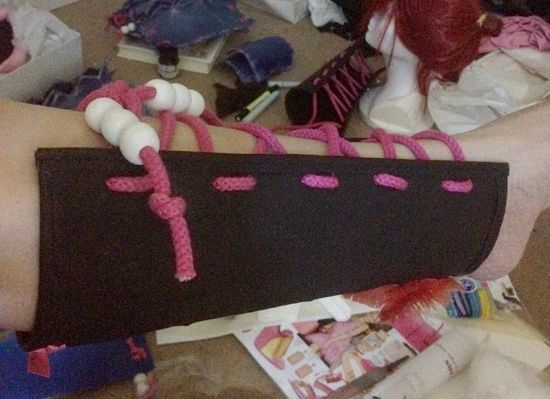
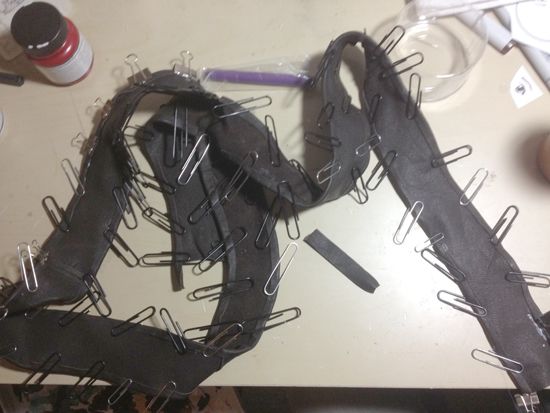
I needed these to be sturdy so I made a base from Wonderflex that I molded to my calves. I modified the pattern I made for my Late But Lucky shin-covers, and marked how I'd "thread" the ribbon. I ended up punching holes (with an awl) for each strip of ribbon to thread, and glued the ribbon ends to the inside of the leather. I glued the leather (after the ribbon trim was completed) to the outside of the Wonderflex. I used paperclips and binder clips to hold the edges together while the glue dried. I used gorilla glue because I was afraid the rough surface of the Wonderflex would render tacky glue a bit useless this time. I sewed 2 more pieces of a brown knit fabric leftover from another project and used these as a "lining", but in actuality I glued these to the inside of the calf guards. For the "trim", I actually sewed the "topstitching" before cutting the leather into 3/4" wide strips and gluing them along the edges of these calf guards. The final step was punching the holes along the front for the cording. The cording is hand-dyed because nobody sells hot pink cording, haha. I bought wooden beads and painted them white.
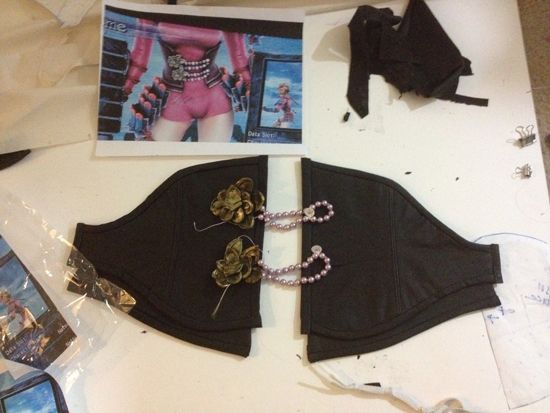
2. Leather corset?
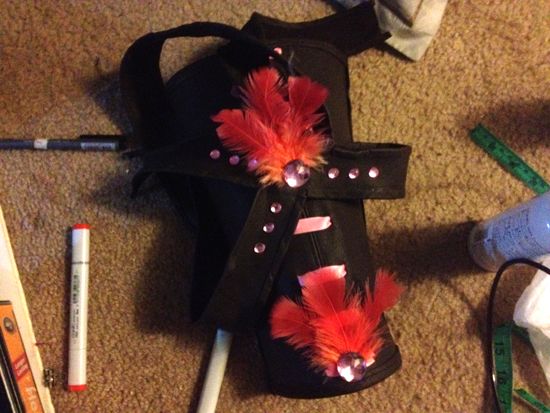
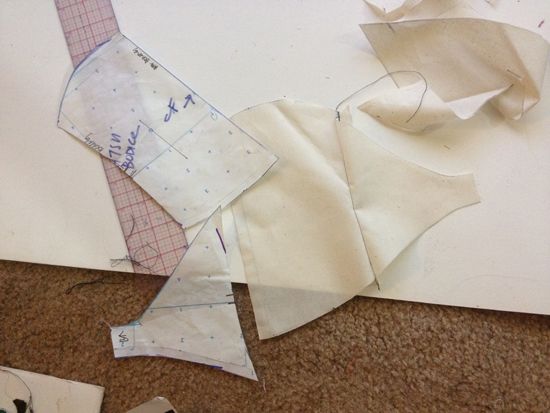
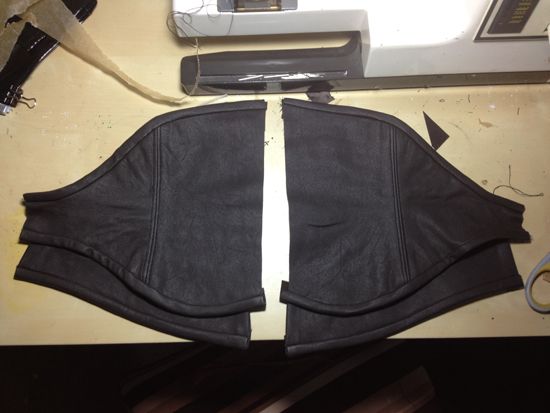
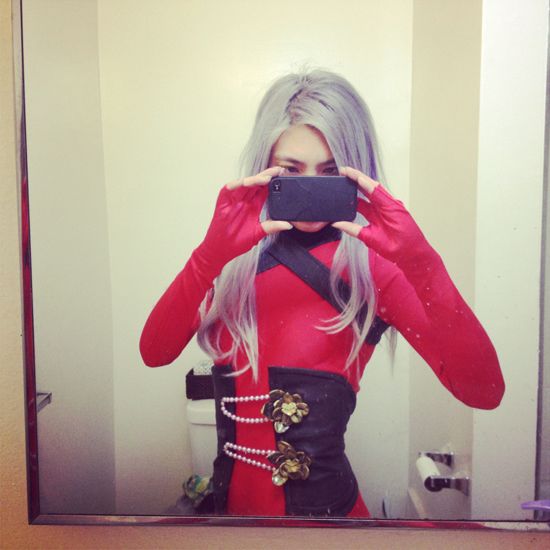
So this isn't really a corset, more like two waist pieces, but I'm not sure what else to call this part of the costume, so "corset" it is. I wanted this to be sturdy as well, but the Wonderflex was actually too THICK with the leather glued onto it, and it wouldn't form to my body as well as going the corset route of adding boning into the layers of fabric that make up the corset. I also tried forming styrene to my body shape, and I just ended up wasting a ton of it (hello, fail whale...). I just eyed where I wanted the corset to start, the width and height, using my measuring tape, and drafted a very simple pattern from the measurements. I draped it on myself and pinched out the excess paper. All the seams to hold the boning are along the inside--there are 3 layers to this corset. The inner layers hold the boning, and the outer layer is the leather, which is actually glued onto these inner layers. This time I was actually able to sew on the leather trim since I didn't have to worry about a layer of Wonderflex to sew through. I debated putting velcro onto the insides of these corset pieces, to stick onto the sides of the bodysuit, but thought that would look tacky (for the bodysuit, anyway) so I ended up using clear elastic to hold the leather "corset" together. As long as I don't eat anything crazy the corset fits perfectly.
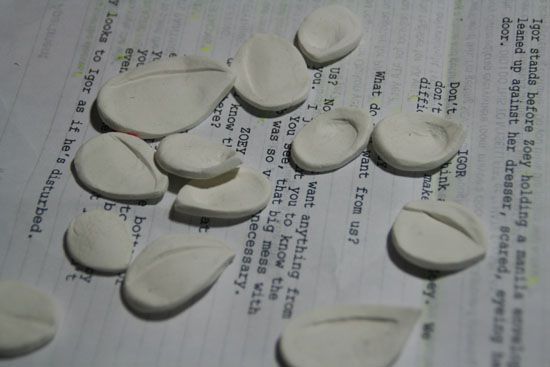
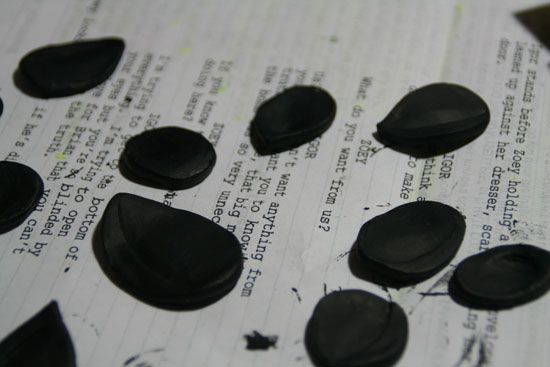
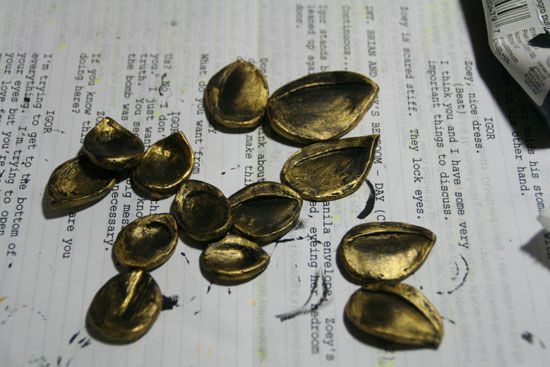
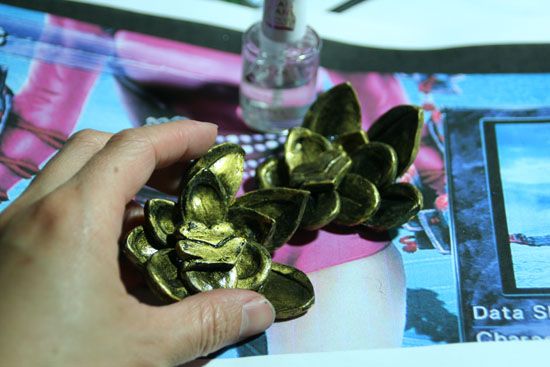
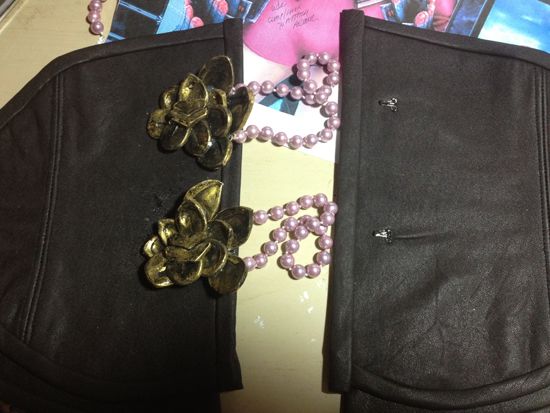
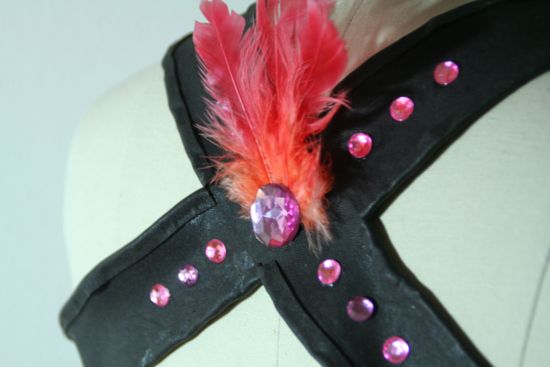
For the flowers at the front of her corset I sculpted them with lightweight stone clay and painted them with the same brushed gold technique as my swords. I glued these to the front with gorilla glue. I bought pearls from a trim store and was pretty lucky to find exactly what I was looking for! I decided the best way for me to get in and out of this corset was to use a hook for the strand to latch onto.
A note on the boning I used: I prefer metal boning but I actually used the cheap plastic boning because I needed very short lengths for this corset. I don't think it as "sturdy" as metal boning but this waist piece isn't actually holding up my chest, I just need some kind of structure and shape.
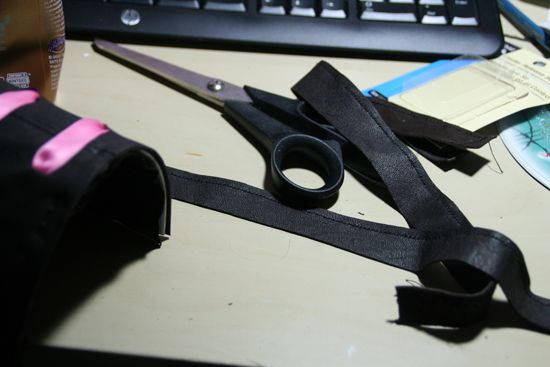
3. "Harness"
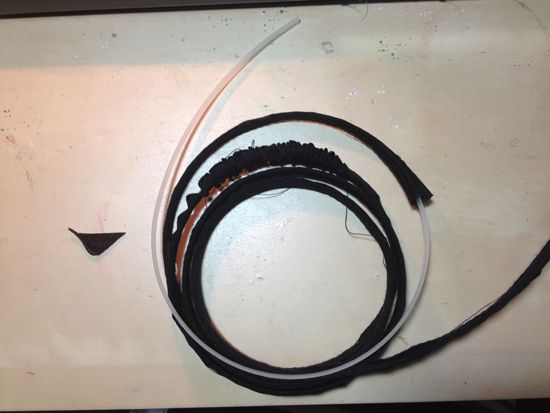
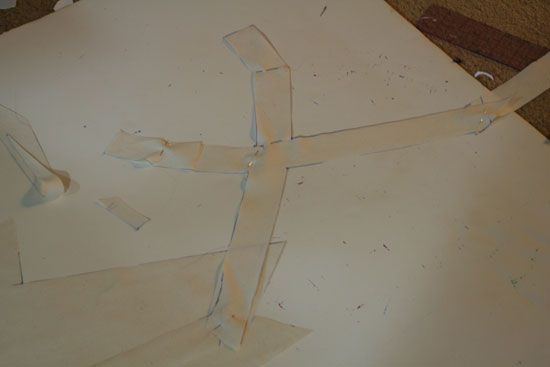
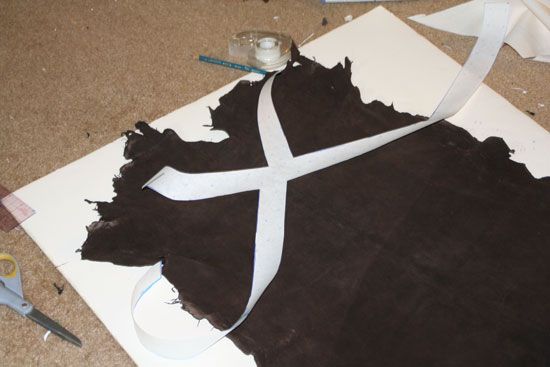
Cutting this piece out also created a lot of wastage in my leather piece since I wanted it to be a continuous piece but it was about 30" in length going both directions... For this part I drafted a paper pattern first, draped it on my dressform, then cut a muslin sample. I draped this again on myself, and cut from the actual leather. I knew that I wanted to use some kind of buckle as the closure, and found a buckle I could modify. I cut a tiny strip of leather to glue along the edges to give a "raised" effect. I altered the buckle using Wonderflex scraps.
3 pcs of leather, each at roughly $20/pc = $60
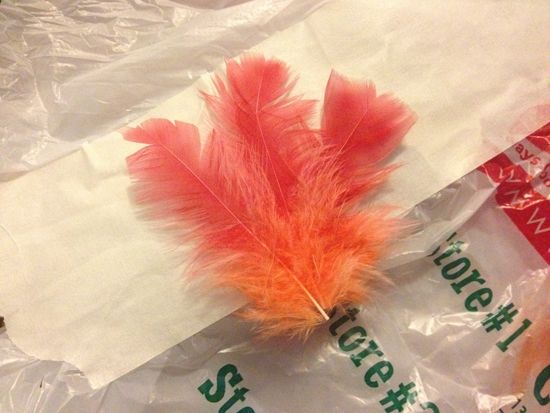
bag of feathers = $4
acrylic jewels (large) = $4
acrylic jewels (small) = $4
plastic boning, $1/yard, I bought 2 yards = $2
strand of pearls (3 strands, $3 each) = $9
clear elastic (small roll of 5 yards) = $4
satin ribbon, $.75/yard (3 yards) = $2.25
white cording, $1/yard (5 yards) = $5
red dye = $6
pink dye = $6
wooden beads (dozen) = $3
My wallet is currently crying because all of this cost me = $109.25


2 comments:
I love the flowers. They look awesome, I would take sometime to create some just for fun.
Good ideas. These flowers are so great to fit the cloth.
Post a Comment